How to crimp wire connectors used in pinball machines
Written by Jacob Cord
At some point you’ll need to do some cable crimping, whether it’s wiring a new FAST board’s connectors, making a repair, or adding connectors to your playfield devices.
Normally, playfield devices like flippers, slingshots, etc. have their wires soldered directly to them. When you’re a big shop producing the same machines en masse, that’s the best way to go. But if you’re building a machine at home in your garage, you may go through many iterations of your design, cutting multiple playfields as you refine your game, and you’ll find that swapping a playfield out is a big job which is only made bigger by having to de-solder or cut your wires to remove the devices. You can certainly do this, but you should at least consider adding connectors to your devices. Once soldered, a connector will make the process of swapping to a new playfield a much simpler one.
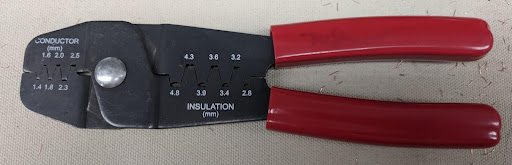
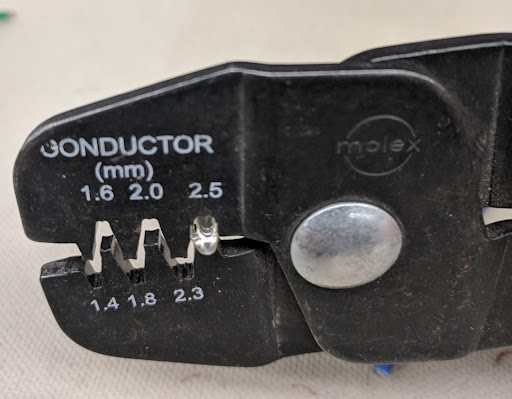
There are many kinds of crimping tools available. I like the style below because it covers a wide range of sizes in one tool. The Engineer PA series of crimpers are also very nice. If you look closely at the opening, you’ll see a heart-shaped bump. As you squeeze the tool to make the crimp, this bump guides the two sides of the connectors to curl back on themselves and grab the wire you're crimping. This makes an excellent connection. There are also more expensive ratcheting crimpers that ensure the proper pressure is always applied to a crimp, and while they are very nice to use, they're certainly not necessary for what we're doing.
Molex connectors have a male and female plastic housing as well as male pins and female sleeves that fit inside the housing to complete the connector. The crimping process for male and female pins and sleeves are the same. Make it a habit to use connectors with different numbers of pins (and sizes, potentially) for different parts. Having two identical Molex connectors for a solenoid and a switch may cause some confusion. I use a 3-pin connector for my solenoids (leaving the center pin empty) and a 2-pin connectors for my switches. I get my Molex connectors from McMaster-Carr, 2- and 3-pole 0.062 pins and sleeves and housings.
If you're adding connectors to your devices, you may find it easier to cut and crimp all the wires first. Cut some wires to about 3” lengths.
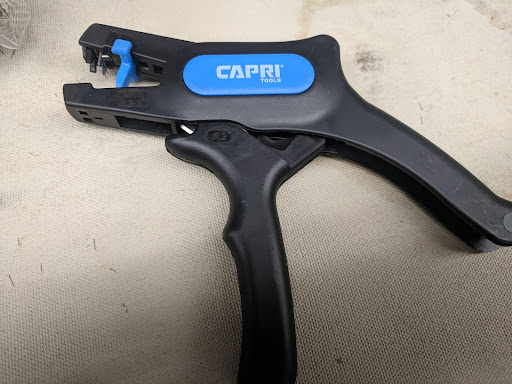
There are many ways to strip wires, and you’ll be doing it a lot when you’re building a pinball machine. I recommend a pair of automatic wire strippers. There are several styles, but I find these work very well for me:
The Molex sleeves and pins have two flanges that you need to crimp. The first, inner flange (1) is what you crimp the stripped wire to. The second, outer flange (2) crimps around the cable jacket. It is important to strip your wire and trim it properly.
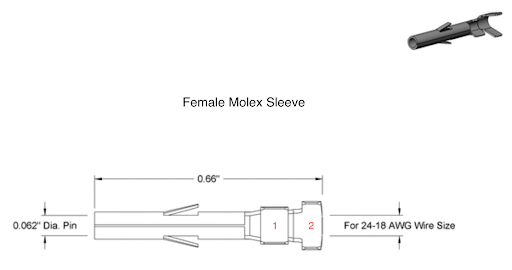
Your wire strippers will probably leave you with too much wire, and the Molex sleeves and pins only need a small amount exposed. If your wire is too long it may interfere with the connector. If it's too short it may not crimp properly. The best way to determine the proper length is to lay a stripped cable in the connector with the jacket in its place (2) and trim the wire just past the end of its crimp section (1). This will often be very short, ⅛” or less depending on the size of the connector.
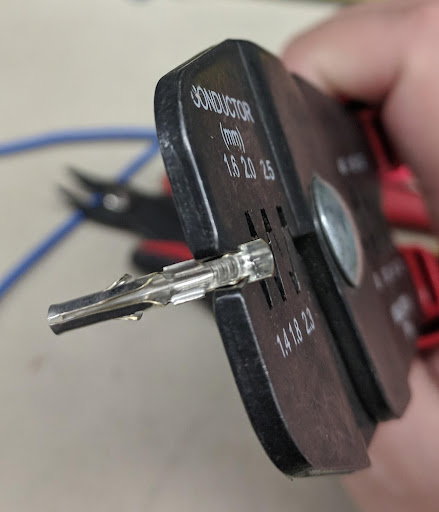
The pins and sleeves that I use can be difficult to get into the crimp tool because they’re too spread out. I usually pinch them until they’re parallel as you can see here:
You should always crimp the inner conductors wires first, then the jacket. I find it easiest to strip the wire, then twist it a few times to keep all the strands together, next trim the wire, and finally crimp it down. The flanges should point into the heart-shaped part of the crimp tool, as that is what forces the flanges to curl around and hold on to the wire. I find it easiest to place the connector in the tool and gently hold it in place, ready to crimp. Then I use my free hand to insert the wire and squeeze the tool.
I repeat the process with the insulation jacket (in a slightly larger crimp position) to finish up.
A well-crimped connection will not pull free if you tug on the wire while holding the pin or sleeve. If your wire pulls out, you should try crimping with a lower setting. Some people also solder these down, but be aware if you choose to do so you must be careful not to add too much bulk to the pin or sleeve as it may no longer fit in the housing. Also if you choose to add solder, do this AFTER you make the crimp connection, rather than "tinning" your wires before. Why? Because tinning the wires takes the pliable bunch of strands and essentially "freezes" them into a circle shape, which interferes with the behavior of the crimp pin which is designed to squash the wires which increases hold strength and electrical surface area.

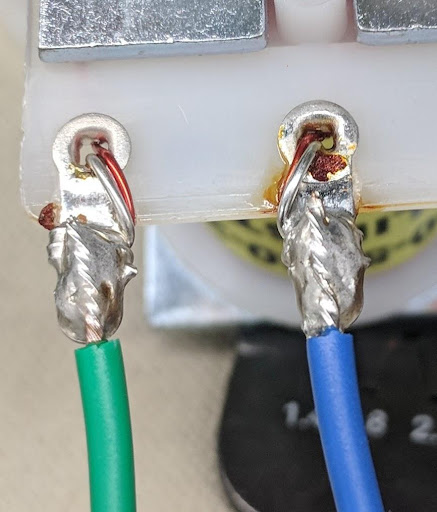
Once the pin or sleeve has been crimped to the wire, strip the other end and solder it to its proper position on the playfield device, being mindful to connect the blue wire to the positive side. (Refer to the FAST Pinball wire standards for wire colors.) It's often easier to tin the wire before soldering it to a connector that you can’t wrap it around or through.
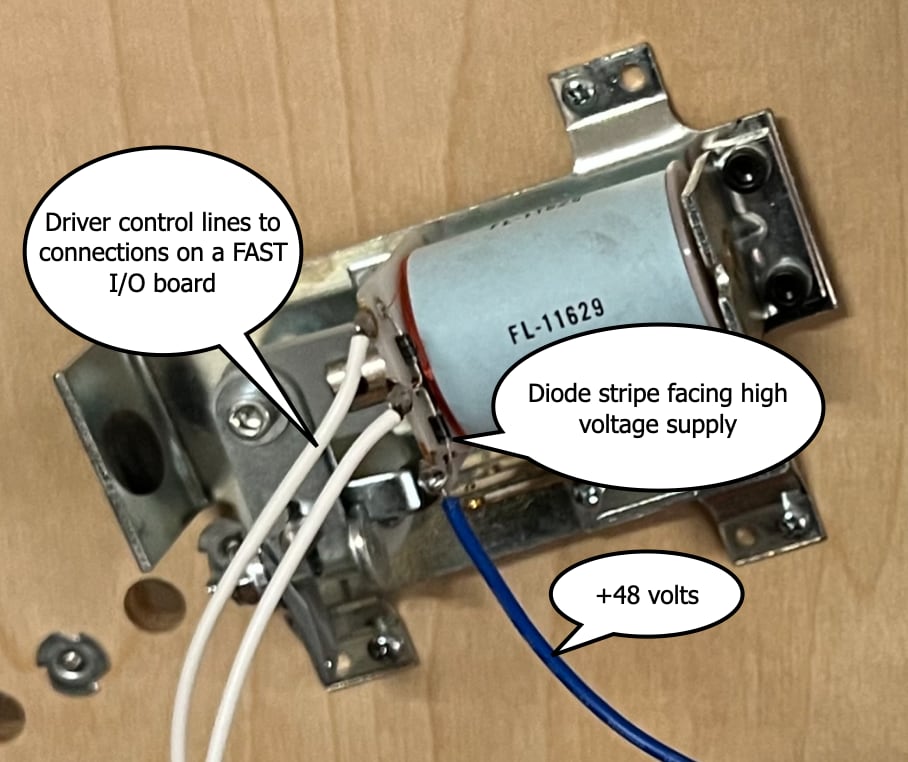
To identify the positive side of the solenoid, look closely and you’ll probably see a small diode (usually 1N4004 or 1N4007). The side of the diode with the stripe (on the left in this picture) is the positive side where your power should connect. The negative side should be connected to the appropriate pin on your FAST I/O Board. I recommend adhering to a wiring color standard, in this case a blue wire carrying 48 volts to the positive side, and a green wire connecting the negative side to your FAST board.
If your solenoid does not have a diode on it, this is a great time to add one. You can align the stripe with either side and solder it to the terminals along with your new wires.
Once the wires are soldered securely, you can push the pins or sleeves into their connector housing. Push until you feel it click into place. Make sure you always install the wires into your connectors the same way.
Further Reading
- Amazingly complete & awesome guide to crimp tools, connectors, and headers
- Pinball-specific guide floating around since 2005(!) on connectors and crimping
N or > jump the next page, P or < for previous, search with S or ?