How to wire the AC input wiring and power supplies in a FAST Neuron pinball machine cabinet
Wiring, high voltage, and electricity can be dangerous. Read this first!
The voltages and electricity discussed here can be dangerous and could cause property loss or death. It is your responsibility to ensure you are aware of these risks and comfortable with these processes. Furthermore your local jurisdiction may have regulations or rules which differ from what we discuss here, including wiring colors, standards, techniques, etc. Although based on broadly adopted methods, FAST Pinball does not employ Professional Engineers and this information is not professional recommendations. There may be errors, omissions, or typos here. Any pinball machine available to the general public should be reviewed by a licensed Professional Engineer in your region. Use this content at your own risk.
This guide is the first in our step-by-step wiring series which shows you how to wire the AC high-voltage to your power supplies in a pinball machine powered by a FAST Neuron Controller. It covers the components in the red box here:

What's covered in this guide
- Only 48-volt and 12-volt supplies are needed.
- How to choose power supplies.
- Why we like the power supplies in the backbox.
- Power switch options: traditional cabinet location, traditional switch, soft switch, etc.
- How to wire your power supplies, the AC line input, AC line fuse, AC power switch
Before you read this guide, you should read these others first:
Design Choice: Will you use the Neuron's "soft power control" option?
Most of our wiring guides provide a simple "just do it like this" way to do things, though occasionally you'll have some design decisions to make. The first decision you need to make before you start wiring anything is whether you want to use the Neuron Controller's soft power control, or whether you want to use a traditional machine power switch.
Overview of the traditional power switch option
A traditional pinball machine uses a main power switch which switches the high-voltage AC power before it enters the power supplies in the machine. This is fine, since it's the way things have been done for decades, it's obviously ok. But there are better ways with modern technology.
One of the downsides of the traditional power switch is that it switches high-voltage AC power. That means if you want the power switch in the traditional under cabinet location, you need to run AC line voltage wires to the front of the cabinet which is potentially dangerous and makes the machine harder to get UL listed. (Or you keep AC out of the cabinet but move the switch to the backbox where it's hard to reach.)
The other downside to this "hard" switch is the machine can't control its own power. The machine logic cannot control its own power, delay power-off until the computer is shut down, or turn off the machine if there's a problem.
Overview of the soft power switch option
This feature is coming soon
The code for the soft start feature is not currently complete. It will be delivered via a future firmware update for the Neuron. You can design your machine for this and build your hardware now (and just use the regular power switch for the time being), with full soft start and soft power off coming in the future.
Pinball machines using FAST Neuron Controller can use an intelligent "soft power switch" feature where the Neuron controls the machine power. This provides several advantages over traditional power switches.
First, with the Neuron soft power switch, the actual power switch is just a momentary low-voltage pushbutton. This means you can keep the power supplies and AC line power safely under a metal cover in the backbox, while still having the power switch in the expected right-front corner of the cabinet. This is much easier for safety and certification reasons, as it means no AC line power is needed in your cabinet.
This soft switch also means the Neuron has full control of the pinball machine's power state. This allows the machine to work more intelligently with the host PC (e.g. don't cut machine power until the PC has safely shut down.) It's also especially powerful when you combine that with the new "smart" features of the power filter board, such as current monitoring, remote 48V enable/disasble control, bad MOSFET detection, short detection, etc. Taken together, a Neuron-powered pinball machine with the soft power switch can actually turn itself off when it detects a dead short or other failure that were render the machine unsafe.
(When using this soft power switch, you can also add a "power mode selector" switch which allows for the machine to be powered on via the breaker box (like most on location machines).
We'll cover the solid state relay and soft power option fully in the next guide. For now just know that a power switch option exists. You can stick with the classic tried and true way, or the new way, or both!
Your machine's "power box"
In this guide, we're going to start building your pinball machine's "power box". This is a section (typically in the lower right corner) of your backbox that contains all the high-voltage AC line power stuff, which is then covered by a protective panel of some kind. The purpose is to contain all the high voltage stuff in a protected place to ensure no one touches line voltage current when the backbox is open. This can be a literal metal box, or, more likely, a metal or plastic cover which separates the components here from peoples' fingers. Don't build this box just yet, as you'll need to include some more pieces from the next few steps.

If you really want to locate your power supplies in your cabinet, you can do that. However the same guidance for containing everything that touches AC under some kind of cover will still apply. Also you would most likely want to include your power filter board there too, and then probably the Neuron and your host PC also. Basically it's sort of "all or nothing", as your power wiring, supplies, Neuron, and computer are all pretty tightly connected, so you'll want to include them all in the same place.
You must use crimped connectors
An important thing to know is that you should not connect your bare stranded wire to the screw terminal of the PSU (or to any screw terminal, for that matter). Instead, use some type of connector which is crimped to the end of your wire. (See our guide to crimping if you're new to this. And, actually, everyone should take a quick peek at this amazingly complete & awesome guide to crimp tools, connectors, and headers.)
Anyway, the you need to use a real connector, not just a bare twisted wire, because you'll be moving some serious current, so you have to maximize proper contact for current throughput with minimal resistance, which is what the various connectors are designed to do. Plus no inspector would ever approve a bare twisted stranded wire smashed under a screw terminal. That's a recipe for a short!
The specific type of connector you use is a personal choice. You could use a fork connector (shown below), or a ferrule, or a ring connector, or probably others.

Some people choose to use ring connectors thinking the ring will prevent the wires from coming off if the screw comes loose. Just be aware that many screw terminals are designed so the screws don't fully come out, making ring connectors annoying in those cases.
Some people have asked if it's ok to "tin" the wires with solder (to ensure stray strands don't come out) and then screw the bare tinned wires into the screw terminals rather than using crimped-on connectors. This is not recommended, as the solder on the tinned wire essentially freezes the wire into a circle shape, meaning the connector crimp can't mash it down, resulting in less conductive surface area contact which results in higher resistance. Fork connectors with non-tinned wires are a standard for a reason.
Wire gauges & wire type
We discussed wire gauges in our guide to wire types, sizing, and colors, which you definitely read already, right? So you know AC wiring should be 16 gauge, stranded, UL-listed wire.
IEC power cord socket + EMI filter
Starting from the back of the machine and working our way in, the first component is the socket that the power cord plugs in to. That hexagonal plug is called an "IEC" plug, and it has three pins for AC hot (sometimes called "line"), neutral, and ground. We like the sockets that have EMI filters built-in. (You could also get a standalone socket and EMI filter, but that's just more steps.)

If you want to build a machine that is compliant to UL listing standards, then you do NOT want to use an IEC socket that has a fuse holder built-in to it. The reason for this is to be compliant, the AC line fuse cannot be "user accessible" from the outside of the machine. (Their reasoning is that a user wouldn't know the importance of proper fuse selection, meaning they could install a fuse that a higher current rating then intended which would create an unsafe situation due to the improperly fused machine.)
If you are building a homebrew machine and don't care about commercial certifications, then you could choose an IEC socket which has a built-in EMI filter and fuse holder.
You'll mount this through your backbox wood so that the socket end is accessible to the outside rear, and then the terminals on the inside are in the area covered by your power box cover.
AC line fuse
It's important that you have a fuse on the AC input line (hot wire) to protect the machine overall. we will cover this in more detail in our guide to fuses, but using default values of 8A for 120V countries and 5A for 240V countries is probably fine.
As we just mentioned above, we like a standalone fuse holder for your AC line fuse so that it's not accessible from the outside of the machine. You could choose to mount this through your power box cover (like in the diagram above), or you could get a surface-mount style fuse holder and screw it into the backbox plywood. (Again just keep it under the power box cover.)
The other fuses in a FAST Pinball modern machine are 5x20mm, so if you want to keep all your fuses the same size, look for a fuseholder that's that size. (6x30mm is the other size, which is larger and what was used in 90s machines, but it's not as common these days.)
Connect the black (hot) wire from your IEC socket to one of the lugs on your fuse holder.
Fuse and AC power switch: which order?
There's been some discussion around what's the "correct" order for the switch and fuse? Line in to fuse to switch? Or line in to switch to fuse? There are pros and cons to each, and again different jurisdictions and inspectors have different views on this.
Most commercial pinball machines, if you look at the schematics, have the line fuse before the power switch. In a FAST Modern machine with the soft power switch option, you need to do this too, since the power switch has two outputs (one for "ON" and one for "SOFT", details below), so the fuse has to be in line for both which means it has to go before the switch.
If you're not using the soft power switch option, you can put the fuse before or after the switch, whatever your preference is.
AC power switch
Next you need to pick a switch to interrupt the main AC high voltage incoming power. The exact switch you select will depend on whether you are going to use the soft-start power option or you will use a traditional switch.
If you are NOT using the soft power control option, then this switch is your main switch
If you are NOT using the soft power control option, then mount this switch through your backbox so it's accessible from the outside. This is how people will turn on your machine. Any simple rocker switch will do, just make sure it's rated for the voltage and current you machine will need. (There are lots of switches with ratings like 15A 250V AC, which is plenty.)
Connect the free lug of your AC line fuse holder to one of the AC switch lugs. (You can also use an all-in-one IEC input + fuse + EMI filter + switch combo.)
If you will use the soft power control option
If you're planning to use the soft power control option, then you want to find a three-way (ON-OFF-ON) SPDT switch. You'll mount it in a way that is NOT accessible from the outside of the machine. (So maybe mount it so it sticks out of the cover of your power box?) This switch will control the following three modes of operation for three switch positions:
-
ON Machine is "always on", meaning when it's plugged in, it's on, and unplugging the machine turns it off. This is the mode used in many arcades where a whole row of machines are powered on or off by flipping a breaker. In this switch position, the low power main pushbutton switch under the cabinet won't do anything.
-
OFF Machine is "always off", meaning it won't turn on even if it's plugged in and the front power button is pushed. This is great for taking a machine out of service since curious members of the public wouldn't be able to turn it on just to see if it's "really broken".
-
SOFT Machine power is controlled via the "soft" low power pushbutton switch in the right front underside of the cabinet. This position utilizes the solid state relay and is what allows that switch to be in the cabinet while all your AC high voltage power stays in the backbox.
For now you can choose just to wire up the ON/OFF positions, and you can add the SOFT position wiring later when you get your solid state relay.
In this case, connect the free lug of your AC line fuse holder to the "common" lug of your SPDT switch. (This is probably the center lug but check your switch docs or use your meter to confirm.)
48-volt and 12-volt power supplies
Now that you have filtered, switched, and fused AC coming in, the next step is to connect it to your power supplies. (We often use the acronym PSU, which technically means "power supply unit".)
As mentioned already, FAST Neuron-powered pinball machines only require 48-volt and 12-volt supplies and do NOT require 5-volt power supplies. If you have a combo 12V/5V supply from a previous project, you can still use it, you just won't need the 5 volt output. (If you do this, DO NOT use the 5 volt output. You do NOT want to mix-and-match 5 volts from a power supply with the local 5 volts a FAST board generates.)
Why is there no 5-volt power supply?
In FAST Neuron-controlled pinball machines, every board receives 12V input power and then locally generates other voltages depending on what they need. (e.g. 3.3V for local logic, 5V for LED chains, 6V for servos, etc.)
There are many advantages to this technique versus having a single large 5V power supply:
-
12V is easier to transmit longer distances than 5V since it needs less current for the same amount of power, and it provides much more overhead and therefore less susceptible to voltage drop.
-
The voltages generated locally on each board are truly their “spec” voltages. (e.g. if you measure the 5V at the LED port, it will actually be 5V and not 4.6V like if it came from a remote 5V PSU due to the resistance & voltage drop.) This helps ensure you don't have to worry about LED discoloration or injecting 5V into the middle or end of an LED chain.
-
It keeps the machine simpler, as you only need to worry about wiring a single 12V circuit for everything.
-
If you do need "more power", then you just need to upgrade that single PSU and that power is available to everything and any voltage.
You cannot use these other voltages for anything else
These “other voltages” generated locally on the boards are not available to be used for accessories other than what each board intends. Much of that is due to the sizing of the voltage regulators on the boards where the conversion is taking place, e.g. an expansion board with 4 LED ports only generates enough 5V for a standard usage of 128 LEDs, etc.
If you need voltage other than 12V anywhere in your system, you should buy a dedicated PSU for it that is sized and fused appropriately for your use case. This is covered in more detail in our guides to smart power filter board wiring and guide to fusing.
Selecting power supplies
If you did not add power supplies to your Neuron starter bundle, you'll need to select them on your own. We have a guide to choosing the right power supplies for your pinball machine, which also includes specific recommendations if you just want to buy the default ones most people use.
We cannot overstate how important it is to select appropriate power supplies. This is not a scenario of "just pull out whatever you have in your drawer". The guide to choosing power supplies discusses current ratings, failure modes, why it's important to choose switching supplies, inrush current, etc.
Mounting your power supplies
You'll most likely screw your power supplies to the plywood back of your backbox. (Read the next few sections first, as you'll need to run a ground braid under them.) You'll need to decide if you want to enclose the entire power supply under your power box cover, or just the high-voltage connector terminals.
Part of this decision will be based on what clearances and air circulation requirements your specific power supply has. You need to ensure you don't mount your power supplies too close together and then cover up their vents with your power box cover, as that could cause them to overheat. (The good news is that most supplies, as we discuss in our selection guide, simply turn off when they overheat, so this can be a problem you don't have to solve unless you need to.)
Connecting wires to your power supplies
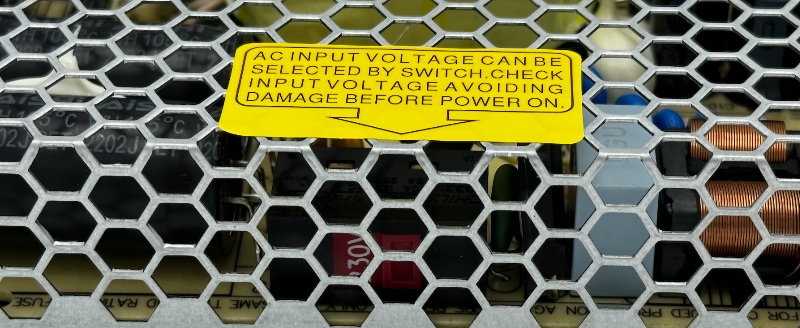
First, before you connect anything to your power supplies, check to see if they have an input voltage selector switch. The 12V supply we recommend has one, and is probably set to 230V by default, so people in North America have to stick a screwdriver through the cage to flip that switch first.
Power supply wiring is pretty straightforward. They have three AC input connections, typically labeled "L" (line, or hot), "N" (neutral), and "G" or the ground symbol for AC ground. Then they have DC outputs, which is just positive (usually labeled something like "+V) and negative (labeled "-V" or "C" or "COM" for common). So your AC wires go in one side, and your DC wires come out the other side.
Run a black hot wire from your AC switch to the line or hot input terminal on each power supply. You can simply connect from the switch to one power supply, then use a second wire on that same terminal from one power supply to the other.
The green ground wire and white neutral wire can be run directly from your AC line input socket directly to your two power supplies.
Connecting multiple power supplies
Since you'll have two power supplies, you'll have connect the hot, neutral, and ground lines from your AC line in to both. The diagram at the top of this guide shows a daisy-chain connection from the first PSU to the second, similar to this one below. (Note there's a different style power switch. Your choice!)

Putting two fork connectors into the same screw terminal on the power supply is allowed, and common. Most fork connectors also allow you to shove two wires into the same crimp. Check the documentation for the specific fork connectors you select to see if this is allowed and there there are any limitations you need to be aware of.
Some people don't like this idea and instead prefer to run each of the three AC lines (hot, neutral, and ground) to their own breakout terminal connectors, and then run dedicated branch lines to each PSU. That's fine too. Here's a drawing showing how this would look with lever wire connectors. (Buy name brands of those too!). You could also use screw terminal barrier strips or some other approved method for connecting multiple high voltage wires inside of appliances. Just keep everything you do here under the protective cover of your power box.

Measuring power supply voltage might be weird at this point
If you measure the DC output voltage of your power supply, you might find that it's not accurate and cannot be adjusted to an accurate range when the PSU is not loaded. (e.g. when there's nothing connected to it.) This is expected, as the voltage regulators in many switching power supplies need a load to get the voltage dialed in. So don't be surprised if you see 13+ volts on your 12V, or over 50V from the 48V DC output with no load.
Once you connect your supply to your power filter board and through all the connectors, that will provide enough load and your power supply should regulate itself properly. In the future when you're verifying voltages, you'll want to measure from the output side of the smart power filter board so you can see the voltage that's actually being delivered to your machine. Measuring at the PSU output doesn't really tell you anything.
Your power supplies might make a high pitched noise when not loaded
Building on the note above about power supplies being weird with no load, you might also notice a high frequency whine or noise coming from your power supply at this point. (This is one of those sounds in the frequency range that younger people can hear better than older people.)
If you notice this, it will most likely go away once the power supply is loaded. There are various sources of this, mostly around the internals of the supply and how it quickly pulses itself to maintain proper voltage which is difficult with no actual load. (You might even hear this in "sync" with something as minor as a status LED flashing on a FAST board.)
Bottom line is if you notice this sound, you can ignore it, and as you get more stuff hooked up (and your power supplies are enclosed in your backbox), it will go away.
Next steps
By this point, you have power supplies wired up to receive AC power. In the next guide, we'll look at wiring up the pieces for the soft power control option. Then we'll cover the smart power filter board wiring before looking at ground wiring and fuse values. After these first five guides, you can start wiring your actual pinball components!
Shopping list for this step
- 16ga stranded wire in black, white, and green.
- Fork crimp connectors for wires
- IEC line input receptacle + EMI filter
- Fuse holder
- SPDT switch, rated for AC power. (Most are 250V / 10A rated which is great.)
- 48-volt power supply
- 12-volt power supply
- Power cord
N or > jump the next page, P or < for previous, search with S or ?