How to update EXP processor firmware
This guide shows you how to update your firmware for EXP processors, which is used for the built-in EXP board on the Neuron Controller, as well as the standalone Expansion Boards.
Just like the NET processor, the firmware code itself is just a text file that you send to the FAST Expansion Board using terminal emulator software such as CoolTerm. Most likely you're familiar with CoolTerm, and how to connect to the proper port and processor. If not, check out the getting started guide for the Neuron Controller or the Nano Controller for details.
Only update your firmware if you bought your boards from FAST Pinball directly
These instructions are only for people who bought their FAST Pinball boards directly from FAST Pinball. If you have a FAST Pinball board that was part of a machine or conversion kit you bought from another company, then their update process will update the firmware if it's needed. This is especially important for Expansion Boards as many products use standard FAST Expansion Boards which run custom firmware. So if you overwrite it with the general firmware, your product might not work correctly.
Understand how the EXP port works
The EXP bus and expansion boards are a bit different than working with the NET processor. The reason for this is when you connect to the NET processor, there's only one NET processor on the other end. But the EXP bus could have multiple boards, each with their own EXP processor. (e.g. the Neuron has an EXP processor for its built-in expansion board, and then every other expansion board has its own EXP processor.)
The EXP port works with an "addressing" scheme where you need to send commands to a specific board at a specific address. Most likely you have one of these boards with the following addresses:
- Neuron's built-in expansion board:
FP-EXP-2000, address48 - Expansion Board with 4 LED headers, 4 servo headers:
FP-EXP-0071, addressB4 - Expansion Board with 8 LED headers:
FP-EXP-0081, address84 - Expansion Board with 4 LED headers, 2 breakout headers:
FP-EXP-0091, address88
If you changed the ID solder jumpers because you have multiples of the same model board, refer to this chart of all the addresses for the various expansion boards.
Update the EXP processor firmware
-
Just like the NET processor, before you connect to the EXP port via CoolTerm, you'll need to change a couple of options in order to send the file. Click the "Options" button in the CoolTerm menu bar, then click on the Transmit page.
- Check the box for
Use transmit line delay - Set
Delay (ms):to200 - Set
Delay characters (hex):to0D(Note that is a zero, not the letter O) - Click
OKand connect
We've found a 200ms line delay to be sufficient, but if your updates are failing partway through you can try a larger line delay. It won’t hurt anything, it just makes the update process a bit slower.

- Check the box for
-
Completely power off, wait a few seconds, and then power on your controller and expansion boards. This is important to reset everything to their fresh states which is needed to update the firmware.
-
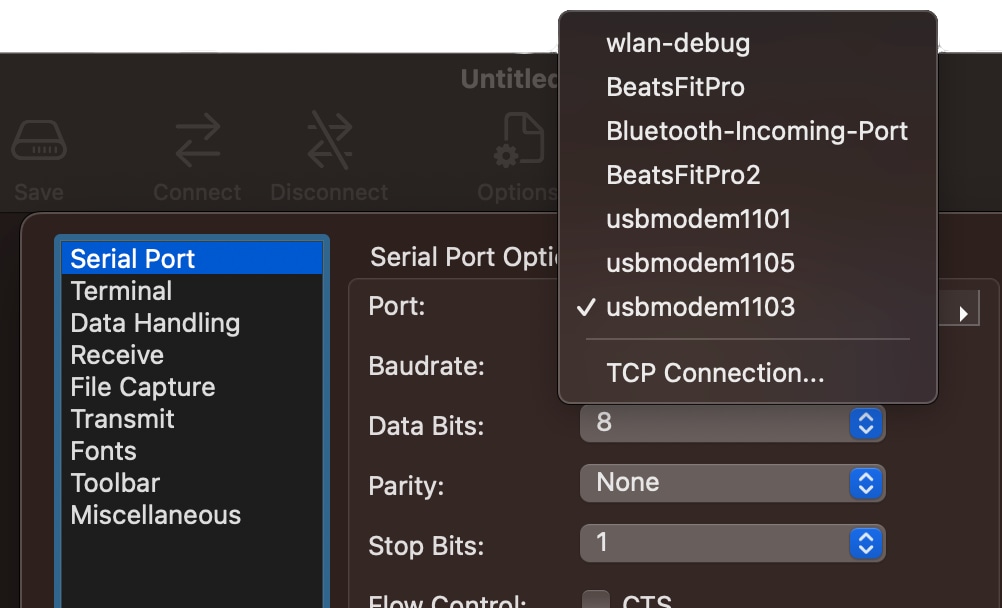
Connect via CoolTerm to the EXP port, which will typically be the numerically second port on the Neuron, and the numerically fourth port if you're using a Nano Controller with the Expansion Hat. Connect with the same settings as the NET processor, (921600 baud, 8-N-1).
-
Once the connection is made in CoolTerm, hit Enter a few times. The cursor should move down each time you hit the key, but you should NOT see anything on the screen. If you get an
XX:Fresponse, that means the board is not in a fresh state and you need to power cycle. (Or it means you're connected to the wrong port.)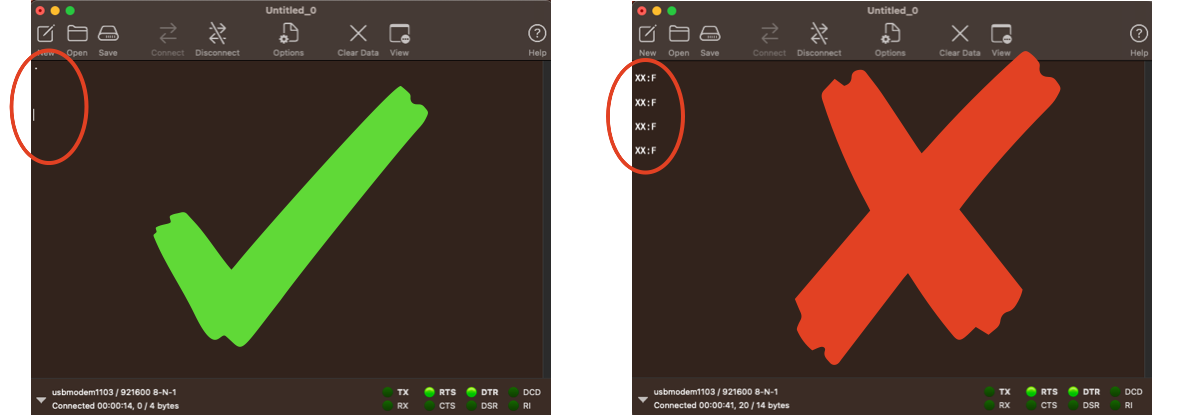
-
Send a command to set the specific EXP processor as active for the board you want to update. If you have more than one expansion board, you will repeat this process, once for each board. In our example, we're going to update the firmware on the Neuron's built-in expansion board, which is at address 48. (Use that list further up this page to get the address for the board you want to update.) The command is
EA:followed by the address, then Enter, e.g.EA:48. There will be no response from the board. Then you can send anID:command to verify the correct board is active and see what firmware version it's running.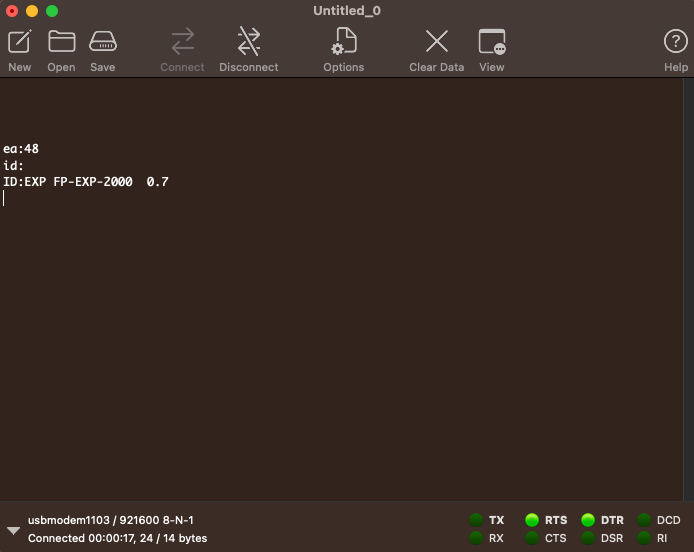
-
In the CoolTerm picture above, we see that we're connected to an
FP-EXP-2000expansion board (which is the ID of the board that's built into the Neuron, verify this model number matches the board you think you're updating). The last number shows it's running firmware version0.7. Checking the firmware page we see that the latest version is 0.9 at the time this guide was written. So we'll send that firmware file to the board. -
In CoolTerm, go to the
Connectionmenu and selectSend Text/Binary File...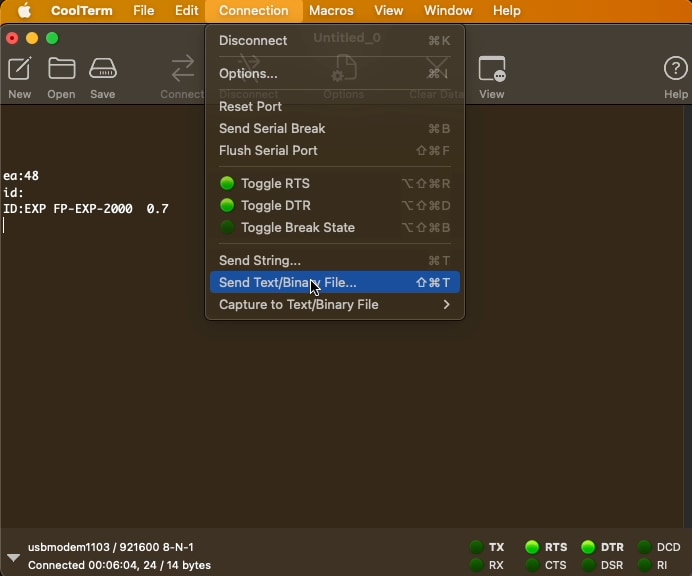
Browse to the firmware file you downloaded, select it, and click
Open. The file will be sent to the processor.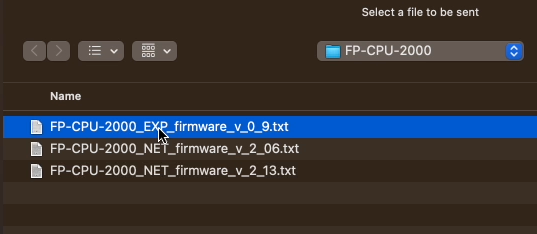
Pro Tip: You can also drag and drop the file onto the CoolTerm window
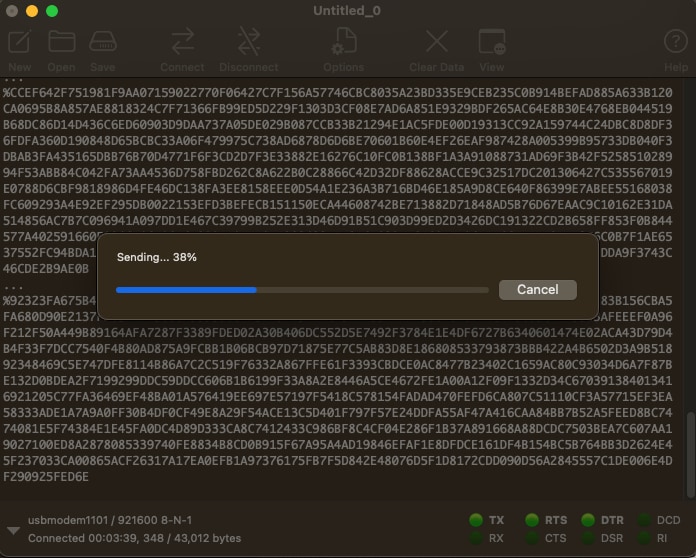
If you prefer, you can also drag and drop the firmware file onto the CoolTerm window. (Just be sure to set the
ea:address first!)CoolTerm will show the progress of the file transfer, and lots of text will scroll by in the terminal window.
Pro Tip: You can disable local echo in the Options screen
If you don't want to see the contents of the firmware file scroll by in the terminal window, you can disable local echo in the Options screen. This can make it easier to see any errors since they might get lost otherwise. Click the
Optionsbutton in the CoolTerm menu bar, then click on theTerminalpage. Uncheck the box forLocal echoand clickOK.When the file transfer is complete, the processor will reboot and you'll see messages in CoolTerm something like this:
!BL2040:00
!BL2040:02
The first line ending in
:00means the board is rebooting, and the:02indicates the processor is up and running after the reboot. -
Now you can verify that the firmware update worked. First send an
ea:with that board's address, since you need to make it active again after the reboot, and then anid:.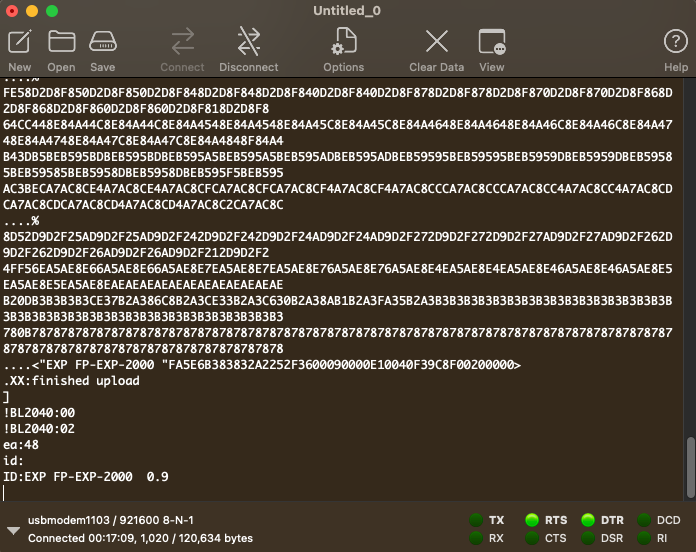
-
This board is now updated! Repeat this process starting at Step 4 for every expansion board you have, using the different specific address for the
ea:command each time. Be sure to select the correct firmware text file for each board. Don't accidentally send the last file you used on the next board! If you send the wrong firmware (e.g. send the EXP-0071 file to an EXP-0081), the whole file will send, but it won't actually install. (The board sees the incoming file is for a different board and it ignores it.) So it doesn't hurt anything, it just wastes the time of sending the wrong file and will confuse you when the file transfer completes but the board doesn't reboot or show a new version.
N or > jump the next page, P or < for previous, search with S or ?